
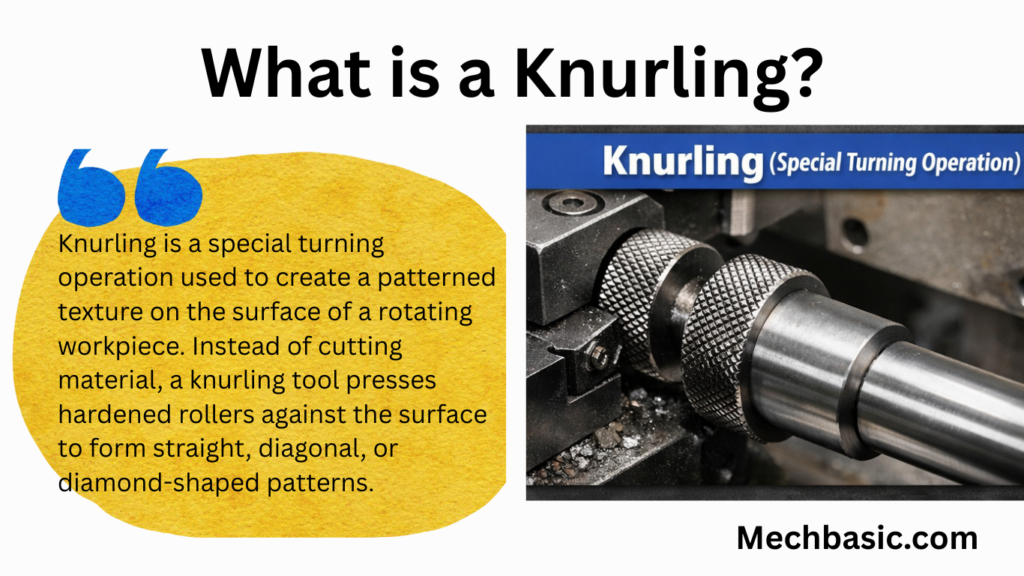
Knurling is a special turning operation used to create a patterned texture on the surface of a rotating workpiece. Instead of cutting material, a knurling tool presses hardened rollers against the surface to form straight, diagonal, or diamond-shaped patterns.
Knurling improves grip, enhances appearance, and is commonly used on handles, knobs, and control wheels.
Knurling Operation on a Lathe
1. What is Knurling?
Knurling is a lathe operation used to produce a regular pattern of straight, diagonal, or crossed ridges on the external surface of a cylindrical workpiece.
Unlike cutting operations, knurling is primarily a forming (deformation) process, where material is pressed rather than removed.
2. Purpose of Knurling
- To improve grip for hand-operated components
- To prevent slipping
- To enhance appearance
- To create a decorative or functional texture
- To slightly increase the diameter of the workpiece
3. Principle of Knurling
- The workpiece rotates in the lathe.
- Hardened knurling wheels are pressed against the rotating surface.
- The surface material flows plastically, forming a raised pattern.
4. Types of Knurling Patterns
a) Straight Knurling
- Ridges parallel to the axis
- Used for light grip
b) Diagonal Knurling
- Ridges at an angle
- Better grip than straight
c) Diamond Knurling
- Crossed diagonal pattern
- Most common, best grip
5. Knurling Tools
- Single-Wheel Knurling Tool
- One knurling wheel
- Used for light knurling
- Double-Wheel (Scissor-Type) Tool
- Two opposing wheels
- Balanced force, less stress on spindle
- Multi-Wheel Knurling Tool
- Used in CNC and production work
Tool materials:
- Hardened steel knurling wheels
- Different pitches (fine, medium, coarse)
6. Knurling Operation Setup
- Work holding: 3-jaw chuck or collet
- Tool setting:
- Tool wheels at center height
- Knurling wheels aligned with work axis
- Workpiece diameter: Preferably chosen to suit knurl pitch
7. Steps in Knurling Operation
- Mount the workpiece securely.
- Fix knurling tool in tool post.
- Set tool at center height.
- Start lathe at low speed.
- Apply heavy pressure to engage wheels.
- Feed tool longitudinally along workpiece.
- Apply coolant or cutting oil.
- Continue until pattern is fully formed.
- Retract tool and stop machine.
8. Knurling Parameters (Typical)
- Speed: Very low (⅓ or less of turning speed)
- Feed: 0.5–2 mm/rev (coarse feed)
- Pressure: High (forming process)
- Coolant: Essential to avoid tearing
9. Common Knurling Defects & Remedies
| Defect | Cause | Remedy |
|---|---|---|
| Double tracking | Wrong diameter | Adjust work diameter |
| Shallow pattern | Low pressure | Increase pressure |
| Torn knurls | High speed | Reduce speed |
| Chatter | Poor rigidity | Use scissor-type tool |
10. Advantages of Knurling
- Improves grip
- Simple operation
- No material wastage
- Can be done quickly
11. Limitations
- Increases work diameter
- Not suitable for brittle materials
- Causes high radial load on machine
12. Applications
- Handles and knobs
- Thumb screws
- Control knobs
- Tool grips
- Adjustment screws
13. Knurling vs Threading
| Knurling | Threading |
|---|---|
| Forming process | Cutting process |
| No lead or pitch | Defined pitch |
| For grip | For fastening |
14. Safety Precautions
- Use low speed
- Apply adequate lubrication
- Ensure rigid clamping
- Keep hands away from rotating knurls
15. Important Exam Points
- Knurling is not a cutting operation
- Causes plastic deformation
- Usually done after turning, before finishing
Other courses:


