
Adjusting a bicycle disc brake ensures smooth braking, eliminates rubbing, and restores proper pad-to-rotor alignment. Here’s a detailed, step-by-step guide for both mechanical and hydraulic disc brakes:
1. Tools You’ll Need
- 5 mm or 6 mm Allen key (for caliper bolts)
- Adjustable wrench or torque wrench
- Optional: flathead screwdriver (for mechanical brakes)
2. Steps for Mechanical Disc Brakes
Mechanical disc brakes use a cable to actuate the caliper.
Step 1: Loosen the Caliper
- Loosen the bolts holding the caliper to the frame/fork (don’t remove them completely).
- This allows the caliper to move freely when centering it over the rotor.
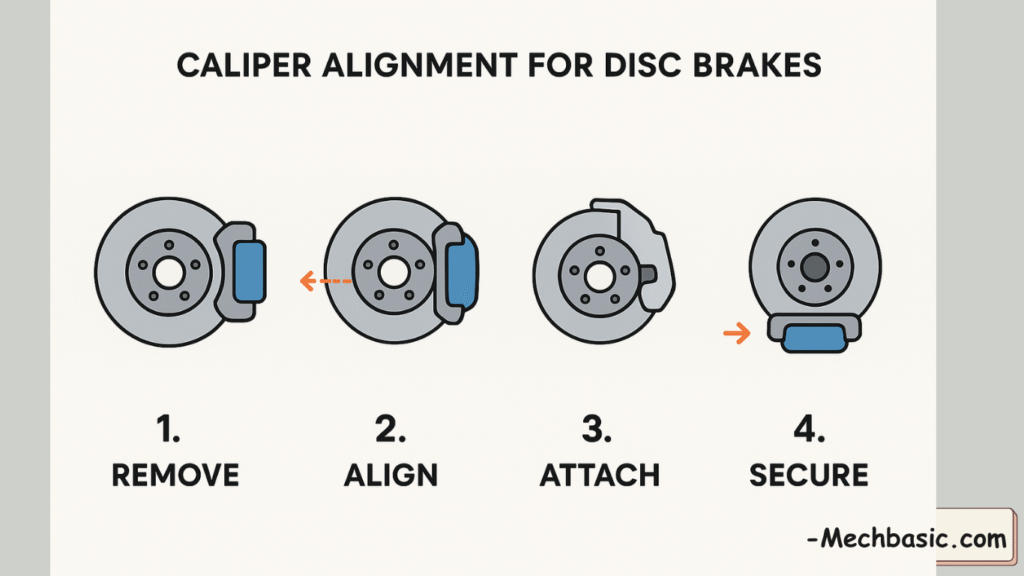
Step 2: Align the Caliper
- Squeeze the brake lever fully.
- While holding the lever, tighten the caliper bolts.
- The caliper will naturally center over the rotor due to cable tension.
Step 3: Fine-Tune Pad Position
- Check for rotor rubbing on the pads.
- Adjust the cable tension using the barrel adjuster:
- Turn clockwise → loosens cable (pads move away from rotor)
- Turn counterclockwise → tightens cable (pads move closer to rotor)
Step 4: Test
- Spin the wheel.
- The rotor should spin freely without rubbing.
- Squeeze the brake lever – the bike should stop smoothly.
3. Steps for Hydraulic Disc Brakes
Hydraulic disc brakes use fluid pressure instead of a cable.
Step 1: Loosen the Caliper
- Loosen the mounting bolts so the caliper can move slightly.
Step 2: Center the Caliper
- Squeeze the brake lever fully and hold it.
- Tighten the caliper bolts while keeping the lever pressed.
- This centers the pistons over the rotor automatically.
Step 3: Check Rotor Clearance
- Spin the wheel.
- Ensure the rotor does not rub the pads.
- If there is slight rubbing, you may need to gently adjust the caliper or check for rotor warp.
Step 4: Test Brakes
- Squeeze the lever to ensure strong, smooth braking.
- Let go and spin the wheel; there should be minimal or no rubbing.
4. Additional Tips
- Make sure the rotor is clean and free of oil/grease before adjustment. Use isopropyl alcohol.
- Tighten bolts to manufacturer-recommended torque.
- For hydraulic brakes, if the lever feels spongy, you may need to bleed the system.
- For persistent rubbing, the rotor may be warped or bent and might need replacement or truing.
Summary:
- Mechanical brakes: Center caliper while holding lever, adjust cable tension.
- Hydraulic brakes: Center caliper while holding lever, pistons self-adjust.
- Always check for rubbing and test braking before riding.
Other courses:


